Ad Widget

Collapse

Announcement

Collapse
No announcement yet.

Tolex instructions

Collapse
X
 
  • Filter
  • Time
  • Show
Clear All
new posts

  • Tolex instructions

    Is there a youtube or other showing how to tolex a fender blackface style amp? I do find an Uncle Doug tutorial, and I did learn a good bit there, but it is for a custom build so it only helps so much. I'm wondering how to deal with the front slant angles, and whether or not to bring the tolex just up to the baffle support edge, or wrap it over like on the rear panel supports.

    I did the two rear panels first. One I did following Uncle doug, by making the miter corner cuts after it was already glued, but I found it way too hard to pull the bottom flap up to remove the cut out piece once it was put in place. The second one I cut the tolex while dry, making sure everything fit nicely, but that has it's drawbacks as well. You have to place the wood once it is glued exactly where it was when dry, or you end up with some errors.

    A lot of effort has gone into this cab so far and I really dont want to mess up my first tolex job.
    It's weird, because it WAS working fine.....

  • #2
    Not Fender BF specifically, but there should be some good ideas here:

    https://ampgarage.com/forum/viewtopic.php?f=11&t=17822
    This isn't the future I signed up for.

    Comment


    • #3
      Small World
      I was up to 3 AM tolexing 2 heads and a 60W 1x 12" combo.
      Still pulling dried up contact cement from my fingers while I write this.

      Timing is critical, so if you
      found it way too hard to pull the bottom flap up to remove the cut out piece once it was put in place.
      then it was already too late, and now, presumably some hours later, even worse.

      I :

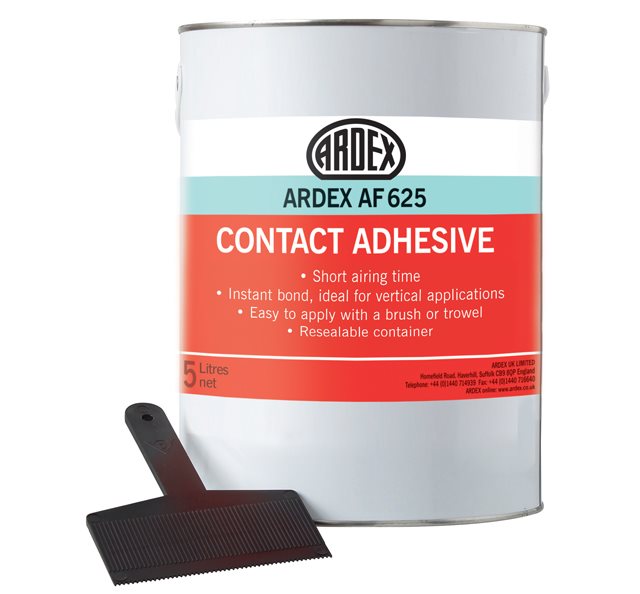
      * contact cement (using the solvent based one) both wood and tolex using a fine toothed notched trowel


      which is both fast and uniform.

      I use a short hard bristle painterīs brush only on edges and corners, not over large flat surfaces.

      Repeat with me: "contact cement is NOT paint!!!"

      * wait 15 minutes , actually until surface is not shiny any more and becomes very tacky.

      * wrap tolex around cabinet smoothing and pressing it as you go, first by hand, then with a small (2.5" wide) smooth edge trowel.

      Pull tolex sideways as needed so as to avoid pockets, bubbles and wrinkles.

      Bend it around edges with firm thumb pressure, bend it inwards and push inside angles with the small smooth trowel.

      * apply first tolex "layer" to corner, then the second one over it, remember itīs tacky so it will hold somewhat, but at the same time not fully dried, so you can still remove it, and cut through both down to the wood with a sharp knife.
      That guarantees both cuts perfectly match.

      Then remove "trapped" bottom one with the knife tip and push the top one in its place.
      Cut will be perfect, edges will match without either superimposing or leaving gaps.

      Thatīs why I said timing is critical: too fresh and it wonīt hold; too dry and it lost tackiness so you remove cut off bits but then second layer does not hold properly.

      If you already preglued wood and tolex many hours ago (more than 2 or 3), IF you have contact cement solvent available (you should) you may lightly brush some on surfaces and "revive" tackiness for, say, 1/2 hour.

      IF you are using or have available the spray can type, slightly mist surfaces to revive it, donīt use too much.

      It takes practice, and then itīs a natural, so you should have made a few fake corners out of scrap wood and practiced first before doing the real one.

      I fear your cement is way too dry now, try to apply a little extra on the corner , which is critical, with a small brush or a toothpick .

      Good luck and show results.

      Almost forgot: you can fill small nicks, voids, exposde wood, etc. with a little "black vinyl adhesive", bought at office or art stores, kids used coloured vinyl glue to "paint".


      Or you may Improvise it with a little regular white carpenterīs glue and a few drops of **water based** black paint.

      Mix is greyish but dries jet black and *looks* like tolex.
      Saved my bacon many times.
      Last edited by J M Fahey; 05-02-2019, 10:45 AM.
      Juan Manuel Fahey

      Comment


      • #4
        Originally posted by J M Fahey View Post
        Small World
        I was up to 3 AM tolexing 2 heads and a 60W 1x 12" combo.
        Still pulling dried up contact cement from my fingers while I write this.

        Timing is critical, so if you then it was already too late, and now, presumably some hours later, even worse.

        I :

        * contact cement (using the solvent based one) both wood and tolex using a fine toothed notched trowel


        which is both fast and uniform.

        I use a short hard bristle painterīs brush only on edges and corners, not over large flat surfaces.

        Repeat with me: "contact cement is NOT paint!!!"

        * wait 15 minutes , actually until surface is not shiny any more and becomes very tacky.

        * wrap tolex around cabinet smoothing and pressing it as you go, first by hand, then with a small (2.5" wide) smooth edge trowel.

        Pull tolex sideways as needed so as to avoid pockets, bubbles and wrinkles.

        Bend it around edges with firm thumb pressure, bend it inwards and push inside angles with the small smooth trowel.

        * apply first tolex "layer" to corner, then the second one over it, remember itīs tacky so it will hold somewhat, but at the same time not fully dried, so you can still remove it, and cut through both down to the wood with a sharp knife.
        That guarantees both cuts perfectly match.

        Then remove "trapped" bottom one with the knife tip and push the top one in its place.
        Cut will be perfect, edges will match without either superimposing or leaving gaps.

        Thatīs why I said timing is critical: too fresh and it wonīt hold; too dry and it lost tackiness so you remove cut off bits but then second layer does not hold properly.

        If you already preglued wood and tolex many hours ago (more than 2 or 3), IF you have contact cement solvent available (you should) you may lightly brush some on surfaces and "revive" tackiness for, say, 1/2 hour.

        IF you are using or have available the spray can type, slightly mist surfaces to revive it, donīt use too much.

        It takes practice, and then itīs a natural, so you should have made a few fake corners out of scrap wood and practiced first before doing the real one.

        I fear your cement is way too dry now, try to apply a little extra on the corner , which is critical, with a small brush or a toothpick .

        Good luck and show results.

        Almost forgot: you can fill small nicks, voids, exposde wood, etc. with a little "black vinyl adhesive", bought at office or art stores, kids used coloured vinyl glue to "paint".


        Or you may Improvise it with a little regular white carpenterīs glue and a few drops of **water based** black paint.

        Mix is greyish but dries jet black and *looks* like tolex.
        Saved my bacon many times.
        Great tips from a seasoned pro!! I hadn't thought to go looking for a product like these Plasticola colored vinyl adhesive products. I'm forever dealing with road rash on all of our rental gear, and a black 'sharpie' just isn't a suitable solution!
        Logic is an organized way of going wrong with confidence

        Comment


        • #5
          I stalked this cab for a week trying to come up with a game plan, and today I launched. The Uncle Doug videos are great, but they don't (and nowhere that I could find) explain how to deal with the Fender front panel angle. I used masking tape like Doug shows to map out the size of tolex I needed. I placed the cab on the back side of the tolex and measured, then outlined with a silver Sharpie. I only pre-glued the side of the cab and matching part of the tolex, but not the edges or flaps. I left the corners purposely unglued, so I could use one as a setting point, and be able to remove it and adjust until I was comfortable pressing down into the glued fabric. Turned it over and rollered it, and then went about following doug's lead. This meant only pre-gluing the section I was working on. This meant I could cut first and glue later. It took much longer, but it gave me confidence in my work.

          My first corner at the back bottom came out really good. I worked my way around at a snail's pace until what was left was the unglued front panel angle. I admit I wasn't sure what to do, and the tolex did bunch up, and I did not execute this perfectly. But once I realized that fixing tolex is a lot like fixing drywall, I made a few repairs by gluing in small fragments and rolling over them with the round part of a screwdriver shaft, and voila! You wouldn't ever see them unless you were looking for it. Anyway, I'm happy, and the other side should go a lot faster. This amp will come together fast after that. All the hardware is sitting in wait.

          Click image for larger version

Name:	001.JPG
Views:	1
Size:	474.2 KB
ID:	853780
          Click image for larger version

Name:	002.JPG
Views:	1
Size:	488.9 KB
ID:	853781
          It's weird, because it WAS working fine.....

          Comment


          • #6
            Finished it today. It looks pretty good. Not perfect, but I give myself and A-. Tolex turns out is pretty forgiving, and the few patches and mistakes I made are barely visible. Here is the outcome.

            Click image for larger version

Name:	001.JPG
Views:	1
Size:	459.3 KB
ID:	853784Click image for larger version

Name:	002.JPG
Views:	2
Size:	472.7 KB
ID:	853785
            It's weird, because it WAS working fine.....

            Comment

            Working...
            X