 Tweet
Tweet
The Dan Erlewine Neck Jig allows you to work on a neck with the normal string tension simulated- ideal for one-shot fret leveling but at $443.50 I think I better pass on that.  However I do think that we could design a neck jig for leveling frets on electric guitars that would cost less than $50.

STEWMAC.COM - Erlewine Neck Jig
I have had a lot of luck using a notched straightedge to visually measure the neck relief when I have the truss rod and bridge adjusted exactly how I want them to be. I then loosen the truss rod (counting the turns) so that unstrung it would have roughly the same neck relief. However I just ran into an LTD EC-256FM guitar of mine that you can loosen the truss rod all you want but without strings you can't get anywhere near the desired neck relief.
So I was checking out the very solid 24" beam level I bought from Harbor Freight for $20 (less 20% with coupon) for refret jobs...
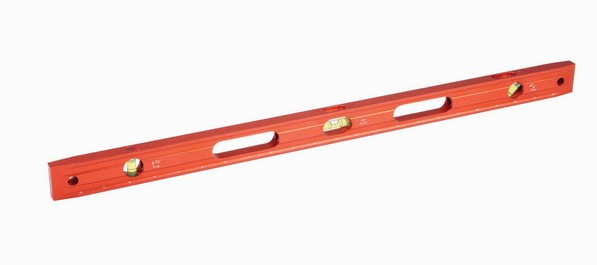
24 in. Solid Aluminum Level
... and figured that if I clamped it to the back of the body and added some sort of jack mechanism I could push on the headstock to simulate the tension created by the strings.
For the clamp I would use the $10 12" handscrew clamp at Harbor Freight. putting neoprene rubber on one of the jaws so as to not damage the finish. Since this is a LP-style guitar with an angled headstock I would have to shim up the beam level about 3/4" to clear the headstock. With the shim I would add a second clamp on the level to make sure it wasn't going to move at all.

12 in. Handscrew Clamp
As for the jacking mechanism at the headstock I was thinking of cutting a C-clamp to remove the threaded piece with the swivel head and threading a hole in the level for it to go through.
To use the MEF neck jig I would clamp on the beam level and then turn the clamp screw until the head (w/ neoprene rubber) was flush with the surface of the headstock. I would then take a few measurements of the distance between the beam level and the neck. After removing the strings I would then adjust the C-clamp piece until those measurements were duplicated.
After setting this up the frets could be leveled exactly as they will be once you restring the guitar. If we can duplicate the neck relief of a strung guitar the fret leveling will be extremely accurate.
A second clamp mechanism could be added in the middle of the neck to help establish the distance between the beam level and the back of the neck.
Any suggestions about the jacking mechanism would be appreciated! (I think that a beam level with shims and clamps will handle that end of the device.)
Steve Ahola
P.S. I bought the 24" beam level for doing refret jobs using Franklin liquid hide glue. After tapping in all 22 frets I put 2 radiused blocks on top of the frets*** with a neck caul under the neck. I then clamp the 24" beam level on top of the two radiused blocks to keep everything even. (I use the shorter handscrew clamps on the neck and the longer one where the body is.)
After letting the liquid hide glue set for about 3 hours I remove the clamps, the level and the blocks and check to see how level the frets are. I use a Sharpie on top of all the frets and then run a 16" sanding block with 600 grit paper softly on top of the frets to see which ones are high. I then hammer the high frets down and reinstall the radius blocks, caul, clamps and beam level and let it set for at least 8 hours.
By doing that the frets come out very level and secured very well to the fretboard so there is not a lot of leveling (and recrowning!) to do. It works for me....
*** The two 8" radiused blocks will cover frets #2 to #22 so I use a small C-clamp on the first fret.


STEWMAC.COM - Erlewine Neck Jig
I have had a lot of luck using a notched straightedge to visually measure the neck relief when I have the truss rod and bridge adjusted exactly how I want them to be. I then loosen the truss rod (counting the turns) so that unstrung it would have roughly the same neck relief. However I just ran into an LTD EC-256FM guitar of mine that you can loosen the truss rod all you want but without strings you can't get anywhere near the desired neck relief.
So I was checking out the very solid 24" beam level I bought from Harbor Freight for $20 (less 20% with coupon) for refret jobs...
24 in. Solid Aluminum Level
... and figured that if I clamped it to the back of the body and added some sort of jack mechanism I could push on the headstock to simulate the tension created by the strings.
For the clamp I would use the $10 12" handscrew clamp at Harbor Freight. putting neoprene rubber on one of the jaws so as to not damage the finish. Since this is a LP-style guitar with an angled headstock I would have to shim up the beam level about 3/4" to clear the headstock. With the shim I would add a second clamp on the level to make sure it wasn't going to move at all.
12 in. Handscrew Clamp
As for the jacking mechanism at the headstock I was thinking of cutting a C-clamp to remove the threaded piece with the swivel head and threading a hole in the level for it to go through.
To use the MEF neck jig I would clamp on the beam level and then turn the clamp screw until the head (w/ neoprene rubber) was flush with the surface of the headstock. I would then take a few measurements of the distance between the beam level and the neck. After removing the strings I would then adjust the C-clamp piece until those measurements were duplicated.
After setting this up the frets could be leveled exactly as they will be once you restring the guitar. If we can duplicate the neck relief of a strung guitar the fret leveling will be extremely accurate.
A second clamp mechanism could be added in the middle of the neck to help establish the distance between the beam level and the back of the neck.
Any suggestions about the jacking mechanism would be appreciated! (I think that a beam level with shims and clamps will handle that end of the device.)
Steve Ahola
P.S. I bought the 24" beam level for doing refret jobs using Franklin liquid hide glue. After tapping in all 22 frets I put 2 radiused blocks on top of the frets*** with a neck caul under the neck. I then clamp the 24" beam level on top of the two radiused blocks to keep everything even. (I use the shorter handscrew clamps on the neck and the longer one where the body is.)
After letting the liquid hide glue set for about 3 hours I remove the clamps, the level and the blocks and check to see how level the frets are. I use a Sharpie on top of all the frets and then run a 16" sanding block with 600 grit paper softly on top of the frets to see which ones are high. I then hammer the high frets down and reinstall the radius blocks, caul, clamps and beam level and let it set for at least 8 hours.
By doing that the frets come out very level and secured very well to the fretboard so there is not a lot of leveling (and recrowning!) to do. It works for me....
*** The two 8" radiused blocks will cover frets #2 to #22 so I use a small C-clamp on the first fret.
Attached Files


Comment