 Tweet
Tweet
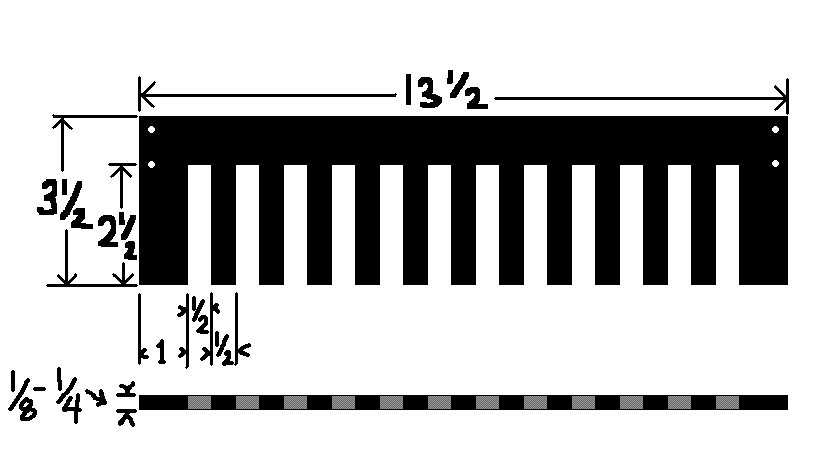
I have an idea for a boxtail joint router jig. First I would have to get a template made. I was thinking either 1/8" steel or 1/4 aluminum.
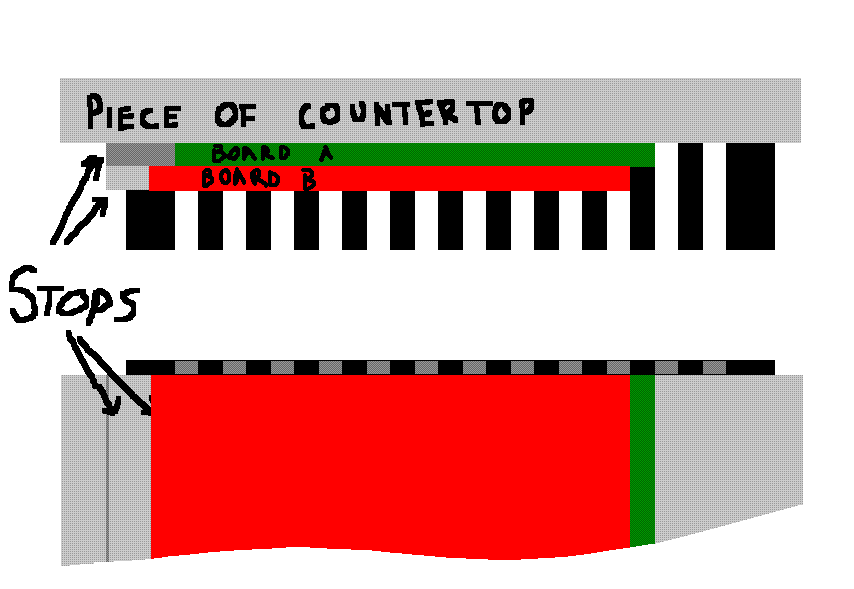
Then I would mount it to a piece of scrap countertop with countersunk screws and use a couple 1xsomethings staggered by 1/2 an inch for stops.
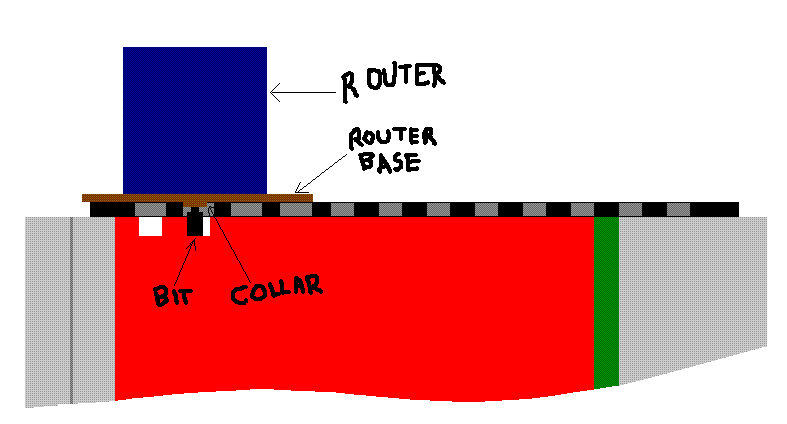
Just clamp in a couple boards, use a 3/8" collar and 3/8" bit on the router, set the depth so it goes into the boards 1/2", and rout away. Note that the bit would have to go into the counter top a bit.
So whad'ya think? Would it work? My main question is how big do the gaps in the template need to be? If exactly 1/2" as shown, I would think the joints would be too tight, but I imagine even a 33/64 gap to 31/64 finger ratio that it would be too loose. But then again maybe not. It would be quite a waste to have a template made only to find out it's no good. I still have to figure out where and if I can get the template made cheap enough to even bother.
Then I would mount it to a piece of scrap countertop with countersunk screws and use a couple 1xsomethings staggered by 1/2 an inch for stops.
Just clamp in a couple boards, use a 3/8" collar and 3/8" bit on the router, set the depth so it goes into the boards 1/2", and rout away. Note that the bit would have to go into the counter top a bit.
So whad'ya think? Would it work? My main question is how big do the gaps in the template need to be? If exactly 1/2" as shown, I would think the joints would be too tight, but I imagine even a 33/64 gap to 31/64 finger ratio that it would be too loose. But then again maybe not. It would be quite a waste to have a template made only to find out it's no good. I still have to figure out where and if I can get the template made cheap enough to even bother.
Comment