Announcement

Collapse
No announcement yet.

Another rookie repair fixed right

Collapse
X
 
  • Filter
  • Time
  • Show
Clear All
new posts

  • Another rookie repair fixed right

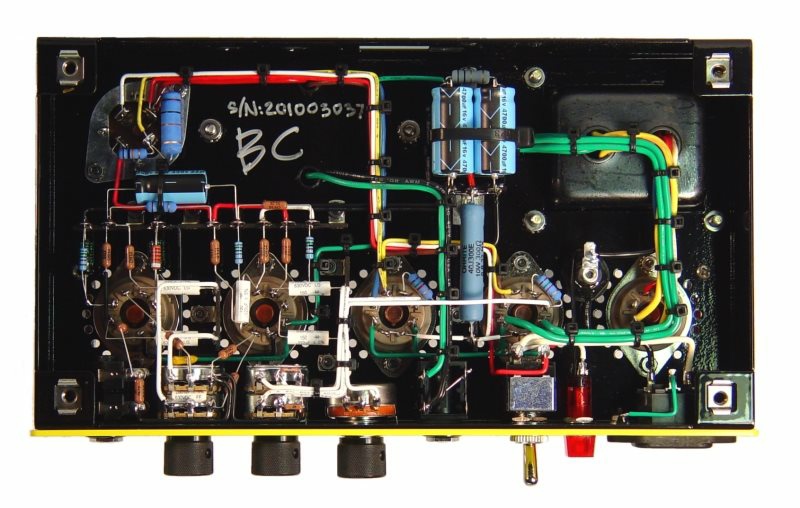
    I don't have an after shot, suffice it to say I replaced the two F&T caps on this friend's amp to fix a shoddy, amateurish repair by someone that at least used good caps. The person simply clipped the leads and soldered the new caps on the old leads so they didn't have to remove the board. It's an HRD so it's a pain to get the board out but still...

    And you can guess what happened underneath the board. Yep, the connections became unsoldered.

    Click image for larger version

Name:	2016-08-20 09.57.52.jpg
Views:	1
Size:	101.3 KB
ID:	870888

    Click image for larger version

Name:	2016-08-20 09.56.59.jpg
Views:	1
Size:	118.7 KB
ID:	870889
    --Jim


    He's like a new set of strings... he just needs to be stretched a bit.

  • #2
    I've got a Randall amp in the shop right now. Here's a picture of one of the output transistors (there are 4). The same thing was done as your caps. Rather than remove the board and do it right, they tacked all of the transistor legs onto the old ones. I couldn't get the best picture because the emitter resistors are in the way. I'm waiting for a reverb tank and then I'll fix all of the crappy work at the same time.

    Click image for larger version

Name:	Randall.jpg
Views:	1
Size:	121.5 KB
ID:	843411
    "I took a photo of my ohm meter... It didn't help." Enzo 8/20/22

    Comment


    • #3
      I'll share this one from a few days back. Twin reverb recap with some wrong value caps and leads clipped and new caps soldered to the old leads. I hoped it was some up and comer, not junky work someone paid good money for from a shop. Who knows. Almost nothing could be easier to work with than power supply on eyelet board

      Click image for larger version

Name:	IMG_1295.jpg
Views:	1
Size:	2.06 MB
ID:	843414

      Comment


      • #4
        Good God! I fail to see why anyone would do that! It seems actually more work to do it wrong on an eyelet board.
        "I took a photo of my ohm meter... It didn't help." Enzo 8/20/22

        Comment


        • #5
          Originally posted by The Dude View Post
          Good God! I fail to see why anyone would do that! It seems actually more work to do it wrong on an eyelet board.
          PSU eyelet boards are easy. Here's an example of an eyelet board rat's nest that I am not looking forward to taking out.

          Click image for larger version

Name:	str-chassis.jpg
Views:	2
Size:	751.7 KB
ID:	843415

          edit: i don't know why the picture isn't coming up.
          "Stand back, I'm holding a calculator." - chinrest

          "I happen to have an original 1955 Stratocaster! The neck and body have been replaced with top quality Warmoth parts, I upgraded the hardware and put in custom, hand wound pickups. It's fabulous. There's nothing like that vintage tone or owning an original." - Chuck H

          Comment


          • #6
            And at least turn all the caps so the values are in plain sight!

            Justin
            "Wow it's red! That doesn't look like the standard Marshall red. It's more like hooker lipstick/clown nose/poodle pecker red." - Chuck H. -
            "Of course that means playing **LOUD** , best but useless solution to modern sissy snowflake players." - J.M. Fahey -
            "All I ever managed to do with that amp was... kill small rodents within a 50 yard radius of my practice building." - Tone Meister -

            Comment


            • #7
              Originally posted by Justin Thomas View Post
              And at least turn all the caps so the values are in plain sight!
              OCD! OK, fine, that's me, too.

              I also feel it's important to orient all the resistor color codes in the same direction...
              --
              I build and repair guitar amps
              http://amps.monkeymatic.com

              Comment


              • #8
                Well, not THAT strong OCD
                Resistors can be read either way; reading a cap label if sandwiched between cap body and board is slightly harder

                I´ll delete this post and apologize the day filter caps come labelled with colour bands
                Juan Manuel Fahey

                Comment


                • #9
                  I do find the half-watt metal film five-banders to be quite confusing sometimes... And yes, I do my best to point them all in the same direction, but that also gets pretty hairy when you (I) build true PTP...

                  Justin
                  "Wow it's red! That doesn't look like the standard Marshall red. It's more like hooker lipstick/clown nose/poodle pecker red." - Chuck H. -
                  "Of course that means playing **LOUD** , best but useless solution to modern sissy snowflake players." - J.M. Fahey -
                  "All I ever managed to do with that amp was... kill small rodents within a 50 yard radius of my practice building." - Tone Meister -

                  Comment


                  • #10
                    I make sure the cap leads are all straight and neatly bent to the right angles too. I don't know why, it makes no difference to anyone but me.
                    --Jim


                    He's like a new set of strings... he just needs to be stretched a bit.

                    Comment


                    • #11
                      It's so cool to see someone do a really nice layout.

                      Comment


                      • #12
                        I've seen no modern builder with greater OCD-fu than Bruce at BC amps:


                        --
                        I build and repair guitar amps
                        http://amps.monkeymatic.com

                        Comment


                        • #13
                          Funny, the initials match another Bruce... Maybe that's why we haven't heard from him for a while?

                          Justin

                          Edit: Nope, just checked...
                          "Wow it's red! That doesn't look like the standard Marshall red. It's more like hooker lipstick/clown nose/poodle pecker red." - Chuck H. -
                          "Of course that means playing **LOUD** , best but useless solution to modern sissy snowflake players." - J.M. Fahey -
                          "All I ever managed to do with that amp was... kill small rodents within a 50 yard radius of my practice building." - Tone Meister -

                          Comment


                          • #14
                            Well I guess this is a thread for the OCDers (me too, actually, but in a different way) so I'm going to admit right now that I HAVE soldered new filters to the old ones leads, BUT... It was a Mesa product WITHOUT the board mounted tube sockets and I'd have had to remove the leads from every socket, jack, switch and pot. Screw that. I did, however, wrap the connections to each other rather than just tack solder and I heat sinked the old leads with pliers below the joint before applying the iron. I used a hot iron and got in and out fast to avoid problems with the pads below. And, of course, I tested for both electrical and physical stability. Just owning up. I don't care if anyone else here "couldn't possibly even think it". It was a practical way to handle it with a reasonable effort. And that makes me smart, not lazy.

                            Doing it on an eyelet board is lazy.
                            "Take two placebos, works twice as well." Enzo

                            "Now get off my lawn with your silicooties and boom-chucka speakers and computers masquerading as amplifiers" Justin Thomas

                            "If you're not interested in opinions and the experience of others, why even start a thread?
                            You can't just expect consent." Helmholtz

                            Comment


                            • #15
                              Oh, I've done it under similar circumstances. But, as you say, if you must, don't just tack the leads with solder and expect that to hold. Wrap the leads, then solder.

                              Something else I've done: If the board is mounted solder side up and there's say an open resistor or something on the bottom/component side. I've unsoldered the resistor, shaken it out of the chassis, and just soldered the new one on the solder side rather than remove the entire board. IMO, it's just as solid of a connection either way.

                              And agreed: Doing this on an eyelet board boggles the mind.
                              "I took a photo of my ohm meter... It didn't help." Enzo 8/20/22

                              Comment

                              Working...
                              X