Ad Widget

Collapse

Announcement

Collapse
No announcement yet.

Sewing Machine Coil Winder?

Collapse
X
 
  • Filter
  • Time
  • Show
Clear All
new posts

  • #61
    Here's a video of my winder:
    Vids :: Winder from wire to counter video by Bizzar_Guitars - Photobucket

    The wire comes off the spool (on the floor), passed through Kleenix in the jaws of a clothes pin (to act as a tensioner), into an arcing plastic tube (which also acts as a tensioner), to the traverse, then through a limiter loop (made to match the bobbin(s) being wound), and onto the bobbin (attached to the 'fly wheel' with double sided tape).

    The traverse is driven by an internal gear in the sewing machine.

    The counter is a reed switch triggered by a rare earth magnet on the gear.

    The actual counter is The Wind Counter program.

    The program gives you: (clockwise from top left) number of turns; turns per minute; number of turns; and estimated completion time.

    It works for me.

    Ciao,

    Garth
    www.BizzarGuitars.ca

    Comment


    • #62
      Thanks Garth. I'll check it out!
      -E.

      Comment


      • #63
        So, The counter I got is going back to the supplier Monday. (local) and....Im going to try the "hacked" calculator method with a reed switch. I couldnt find a reed switch at the local radio shack, so while Im out Monday, a stop at a better electronics supplier for a reed switch. In the meantime, I'll also be searching for a rotational mechanical counter....
        A question (maybe dumb) but on a sewing machine that has no reverse....how does one reverse wind? Is it as simple as putting the coil the opposite direction? Or, is it not possible...Im just not picturing it in my head at the moment.

        Comment


        • #64
          Originally posted by lexluthier72 View Post
          ...
          A question (maybe dumb) but on a sewing machine that has no reverse....how does one reverse wind? Is it as simple as putting the coil the opposite direction? ....
          Yes, just put the bobbin onto the machine the opposite way.
          -Brad

          ClassicAmplification.com

          Comment


          • #65
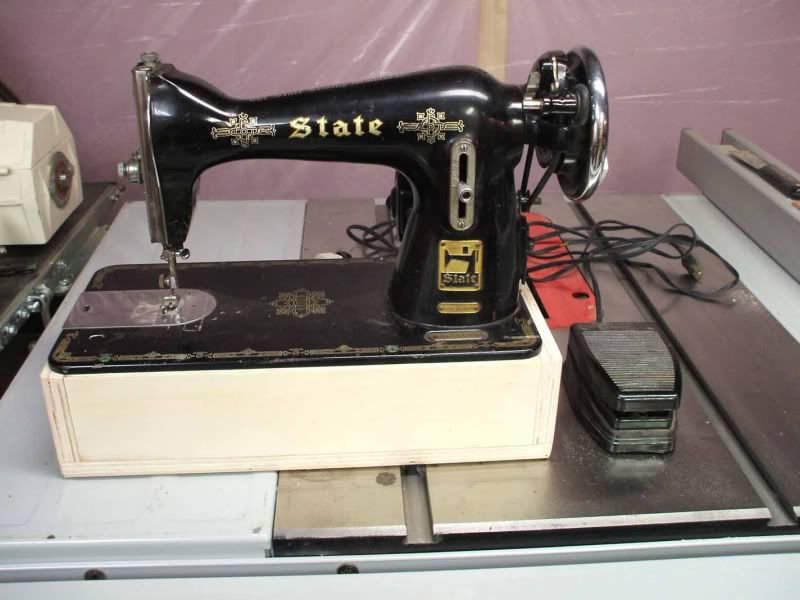
            Winder #2:


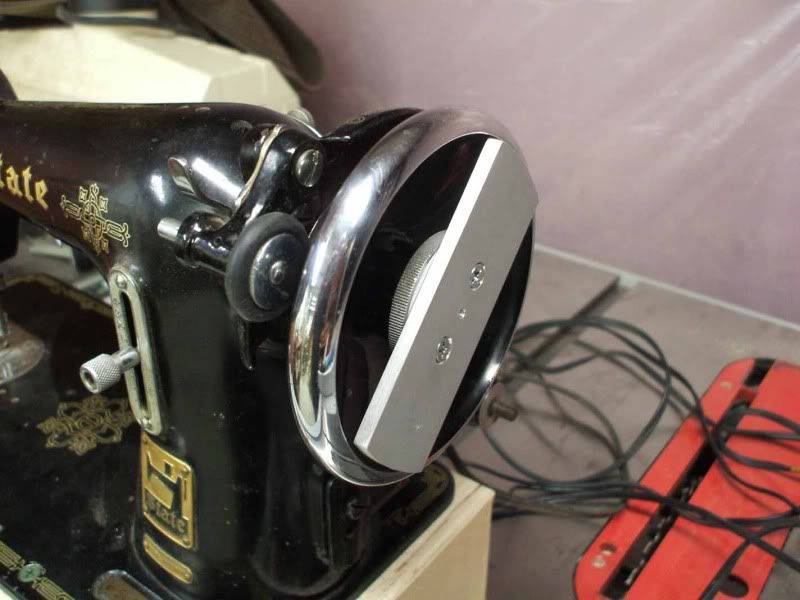
            Side View of the Modified Handwheel:


            RedHouse....Thanks!

            I have to get the reed switch, and pick up a cheap calculator tomorrow....more progress photos soon. The machine was $12 at the local goodwill. =) The center hole in the Handwheel plate is tapped for a 4-40 screw, so one can simply bolt on any strat style bobbin right to the plate.
            Last edited by lexluthier72; 12-06-2010, 06:00 AM. Reason: photo problem

            Comment


            • #66
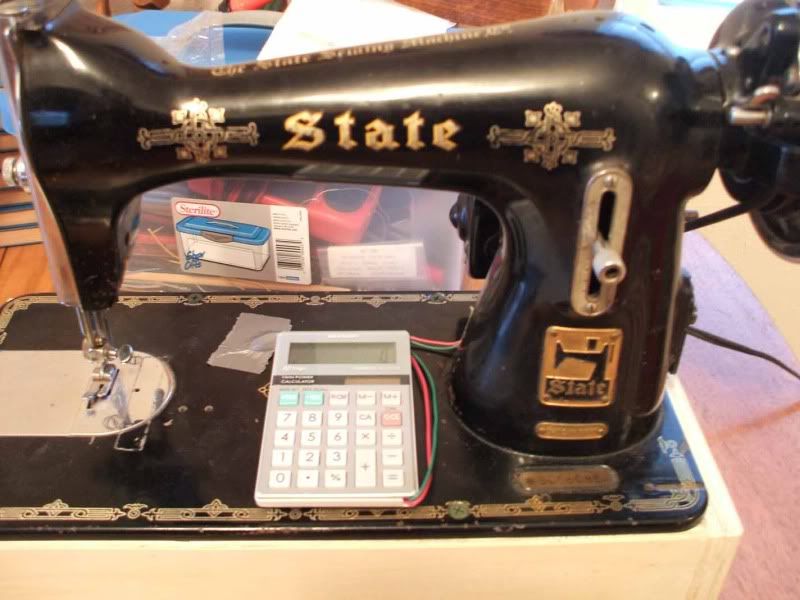
              Ok....Here it is.....


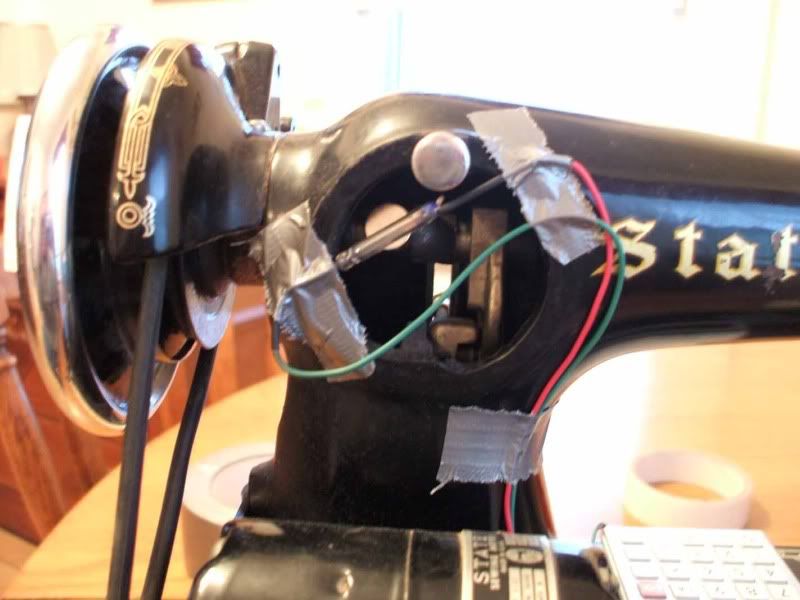
              Closeup of the reed switch (duct tape is temporary)


              Now my only question (for the moment) is how far away and what type of position should the reed switch be in to get optimum reading (ie, not overide the calculators "debounce" circuit) Right now it doesn't go very fast before it starts skip counting. At least its a start! I still have to build some sort of limit stops for the wire... Any input would be greatly appreciated.
              -Erin

              Comment


              • #67
                Erin, this old thread might help you out:
                http://music-electronics-forum.com/t10241/#post106193

                Comment


                • #68
                  Dave....There is some good info there, but I too would need a photo of Joe Gwinns setup. From the sounds of it, Id also need more space behind the winder for mounting the "plates" he is talking about. In theory it sounds like it would work well. The other thing I may find is it works fine once I get to actually winding a coil. I may also find that winding slower is fine, as I plan to use this only for rewinding dead coils, coupled with the fact that the foot control already slightly limits the top speed.
                  I think I may have a plan for the limit stops, and where to mount them. It seems like many folks have the mounting a few (4) inches away or so from the actual coil. Is there an advantage of too close versus too far?
                  -Erin

                  Comment


                  • #69
                    Originally posted by lexluthier72 View Post
                    ...It seems like many folks have the mounting a few (4) inches away or so from the actual coil. Is there an advantage of too close versus too far?...
                    When you get winding you will see how the wire actually jumps around quite a bit, doesn't go on steady in a nice wrapping fashion.

                    When the limiters are close they keep an absolute stop, when they are far away the wire can jump past were you want it to be, which is usually like on-top or outside the bobbin flatwork which means you have to stop and peel off some wire and start again.

                    Close-in the limiters do their job much better.
                    -Brad

                    ClassicAmplification.com

                    Comment


                    • #70
                      so, then whats a good starting distance? and how close is too close?

                      Comment


                      • #71
                        Originally posted by lexluthier72 View Post
                        so, then whats a good starting distance? and how close is too close?
                        Up to you (of course) but what I did last time I built a winder was to mount the largest bobbin I would be using, then I set the posts like 1/2" away from the bobbin (as it swings round) that way there was phudge room.

                        I don't have any pics of my latest winder but this pic of my v2 winder shows a Jazz Bass bobbin and where the posts were located relative to that.
                        Attached Files
                        -Brad

                        ClassicAmplification.com

                        Comment


                        • #72
                          Ok. Thanks! Also....I was able to vastly improve the action of the reed switch by turning it so it is parallel to the bobbin mounting plate. I posted a thread titled "reed switch question" and another member suggested I switch the sensor type to a door proximity type reed switch rather than the glass type I have. Its worth a shot for $5. At any rate, now I think Im limited by the vibration of the actual machine. Its pretty smooth until it gets going at top speed, then the counter starts to bounce. I'll get some rubber feet under the thing and see if it improves it any, but I think switching type of reed sensor may fix it.
                          -E.
                          time to start devising how to mount the limit stops, as I dont want to muck up the cool look of the winder. =)

                          Comment


                          • #73
                            p.s.- where did you get your limit stop "collars"? pretty hip, I like the extended arms travelling upward!

                            Comment


                            • #74
                              Originally posted by lexluthier72 View Post
                              Ok. I posted a thread titled "reed switch question" and another member suggested I switch the sensor type to a door proximity type reed switch rather than the glass type I have.
                              All reed switches have a glass capsule. The door proximity switch is a glass reed switch in a plastic housing. The good ones pot the reed switch, the cheaper proximity switches just have the switch loose in the housing.

                              At any rate, now I think I'm limited by the vibration of the actual machine. Its pretty smooth until it gets going at top speed, then the counter starts to bounce. I'll get some rubber feet under the thing and see if it improves it any, but I think switching type of reed sensor may fix it.
                              It should not vibrate so much. Something is unbalanced. It should be easy to find.

                              Comment


                              • #75
                                Joe- Thanks for the info! Im assuming there is no way to tell which ones are "potted"
                                As far as Vibration....The machine itself is from the 30s....so, I expect some vibration from wear over the last 70 years....It only vibrates at the very top speed, I suspect the belt is not quite in alignment, and I know for certain the belt is pretty much worn out.
                                Can you explain more on positioning of the switch to improve the action, and minimize circuit bounce?

                                Comment

                                Working...
                                X