Ad Widget

Collapse

Announcement

Collapse
No announcement yet.

Do you think this box joint jig will work?

Collapse
X
 
  • Filter
  • Time
  • Show
Clear All
new posts

  • #16
    For those of you that may have a tablesaw and a dado blade
    you can make the box joints pretty easily with an easy-to-make
    fixture. For some examples, see :

    Using a Box Joint Jig - NewWoodworker.com LLC

    Song of the Great Lakes - Simple Box Joint Jig

    toolbox_good_hands.shtml

    Shopsmith - Articles and Projects - Use & Sharpening Instructions for Hand Scrapers

    I'd put a big block of wood in back of the fixture to prevent
    dado'ing your thumb...

    Paul P
    Comment


    • #17
      Well... I'm a bit hung up here. Not with the finger joint jig, but with cutting the planks with just a circular saw. I'm starting a seperate thread on that since it's a different issue.

      Comment


      • #18
        O.k. Took a little time off from this project but am back at it now. Got some nice square planks cut as discussed in this thread.

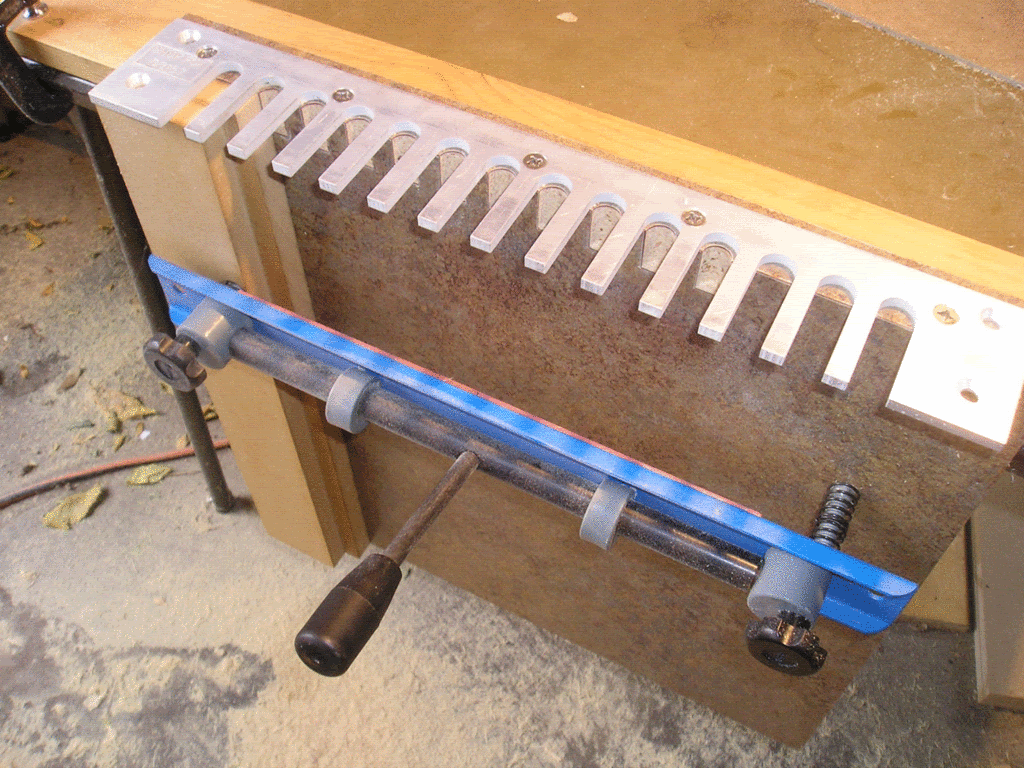
        Here's the jig.

        How does it work? Well, on the first try, I think it the jig works fine... the router is another story. I had two big issues that mucked up the results.

        It's a Ryobi R161 1-1/2 hp router. It's ok for a $60 router, maybe a little underpowered, but the plastic template guide bushings are junk and held in in a way that they can shift around, which is what happened. This caused the slots to be extra-wide as I made a couple of passes. And when the bushing shifted the bit cut into the collar wall, making it thin on one side and it actually cracked.

        Also, the bit somehow snuck out over an eight of an inch causing the slots to be way too deep. I know I didn't just set it wrong because I can see a slight notch where the bit was initially (and before the bushing shifted). The bit was in tight. It just somehow worked it's way out. I think part of the problem is that the router is a little underpowered and jerks around a lot as it tries to chew through that much wood.

        I have a few solutions to these problems:
        1) Trade up to a Porter Cable 1-3/4" hp router. Yes, dump more money into this operation. But a) I need a new bushing anyway and Porter Cable has the only commonly available system. You gotta special order the crappy Ryobi ones. b) Their bushing system looks to be a much better design c)Maybe the extra 1/4 hp will help? Maybe not. d) I'm hoping it will be constructed a little more stabile and handle jerking around without having the height shift.

        1-a) A local store has a universal base plate that uses the Porter Cable bushing system. It's only $20 plus another ~$15 for the bushing/lock nut. I would get the benifits of a & b above but not c or d, for almost $100 less. However I pretty much guarentee that the "universal" base won't fit and I'd have to drill my own holes in it and such.

        2)Make an initial pass with a 3/8" bit, or even a 1/4" then a 3/8". This would lighten the load of the 1/2" bit considerably and make it more of a finishing bit.

        Comment


        • #19
          My First Project

          I bought a Keller 1500 Dovetail Jig and a porter cable router and am trying to make an oversized, closed back 1x12 combo cabinet. This was my first attemp at dovetail joints and it came out pretty decent. I first tried it with 3/4" birch plywood but the router bit was tearing it up more than routing it. I later discovered that I needed face boards on the front to keep it from chipping the edges. After I figured that out, it worked remarkably well. A bit of glue and that joint is stronger than the wood is. $119 forthe jig and $98 for the router. That was a good investment in my book. The box in the picture is made out of poplar wood but I'm not sure if I'm keen on making it out of that.
          Attached Files

          Comment


          • #20
            Originally posted by Paul P View Post
            For those of you that may have a tablesaw and a dado blade
            you can make the box joints pretty easily with an easy-to-make
            fixture. For some examples, see :

            Using a Box Joint Jig - NewWoodworker.com LLC

            Song of the Great Lakes - Simple Box Joint Jig

            toolbox_good_hands.shtml

            Shopsmith - Articles and Projects - Use & Sharpening Instructions for Hand Scrapers

            I'd put a big block of wood in back of the fixture to prevent
            dado'ing your thumb...

            Paul P
            I made a jig similar to this concept for a router table instead of a Dado Saw. It works great and is simple and safe to use. The Dado always makes me a little nervous.
            DIY Links

            Tolex Tutorial
            http://www.guitarkitbuilder.com/cont...lifier-cabinet

            Chassis:
            http://www.guitarkitbuilder.com/cont...lifier-chassis

            Turret board:
            http://www.guitarkitbuilder.com/cont...d-construction

            Comment


            • #21
              Geez, how many times have I mentioned that I'm coming back to this project after a break? Guess you can see how I roll. This time it was a long, brutal winter that knocked me of the horse (my "shop" was in a leaky, unheated garage, I'm inside now) and I've just gotten around to getting back on. So anyway...

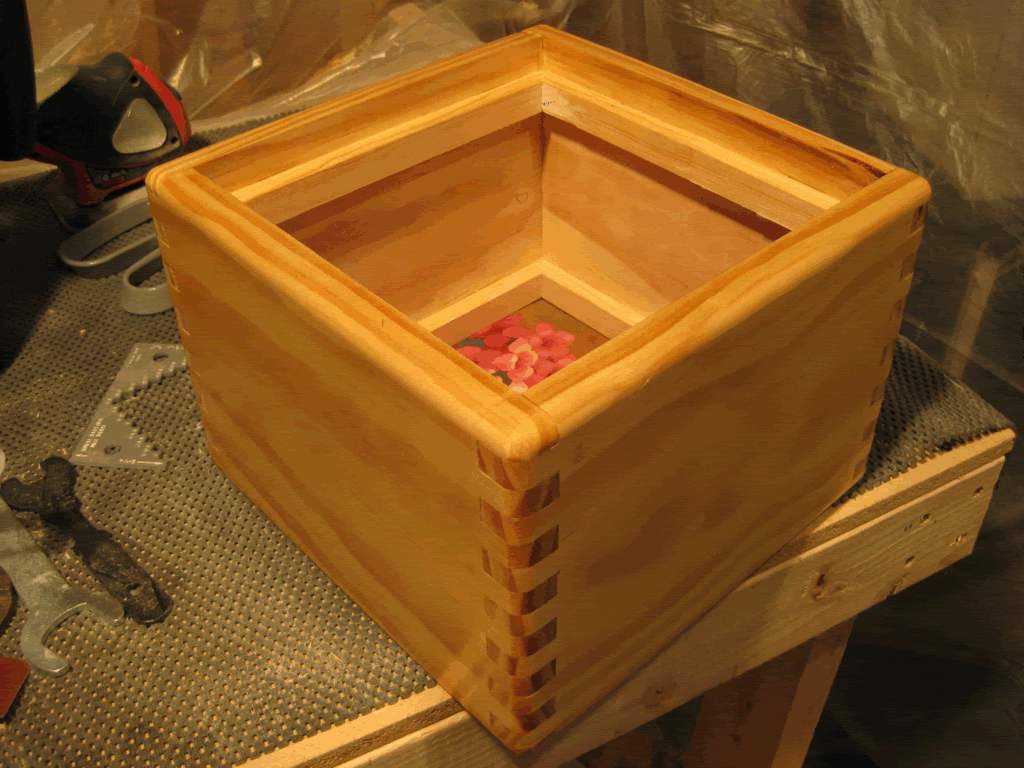
              Here's the guinea pig project. I was pleasantly surprised with the results.


              I did end up getting a better router, a Porter Cable 690LR to be exact, and it was well worth it. I highly recommend not screwing around with anything less, you'll regret it. The bushings are widely available and waaay better, it runs way smoother, and the extra 1/4hp (if that's all it really is?..I doubt it) makes a huge difference.

              I also bought a 1/4" spiral upcut bit and did an initial pass with it set about an 1/8" shallow and using a 1/2" collar. The upcut bit goes through the wood like butter and gets 80% of the wood out of the way, making the work of the regular 1/2" bit much easier. Did I need to do this? I don't know, but it seemed like a good idea given my previous experience. Probably keeps the 1/2" bit from burning out. I wouldn't hesitate to us a 1/2" upcut bit on a single pass if I had one.

              The blowout on my test piece wasn't too bad but there was some. I ended up gluing two pieces of scrap together 1/2" staggered to put up against the work pieces opposite the stop. I then put a strip of masking tape across the front. That pretty much took care of the blowout.

              The next time I'll probably make the cuts a hair deeper and trim the excess with a flush trim bit. Not only would that take car of any excess glue, but I also ended up with two of the corners not quite getting jammed together all the way and leaving a teeny bit of a recess. But that's another thread.

              Comment

              Working...
              X